1. Workspace Screen Overview and Basic Functions
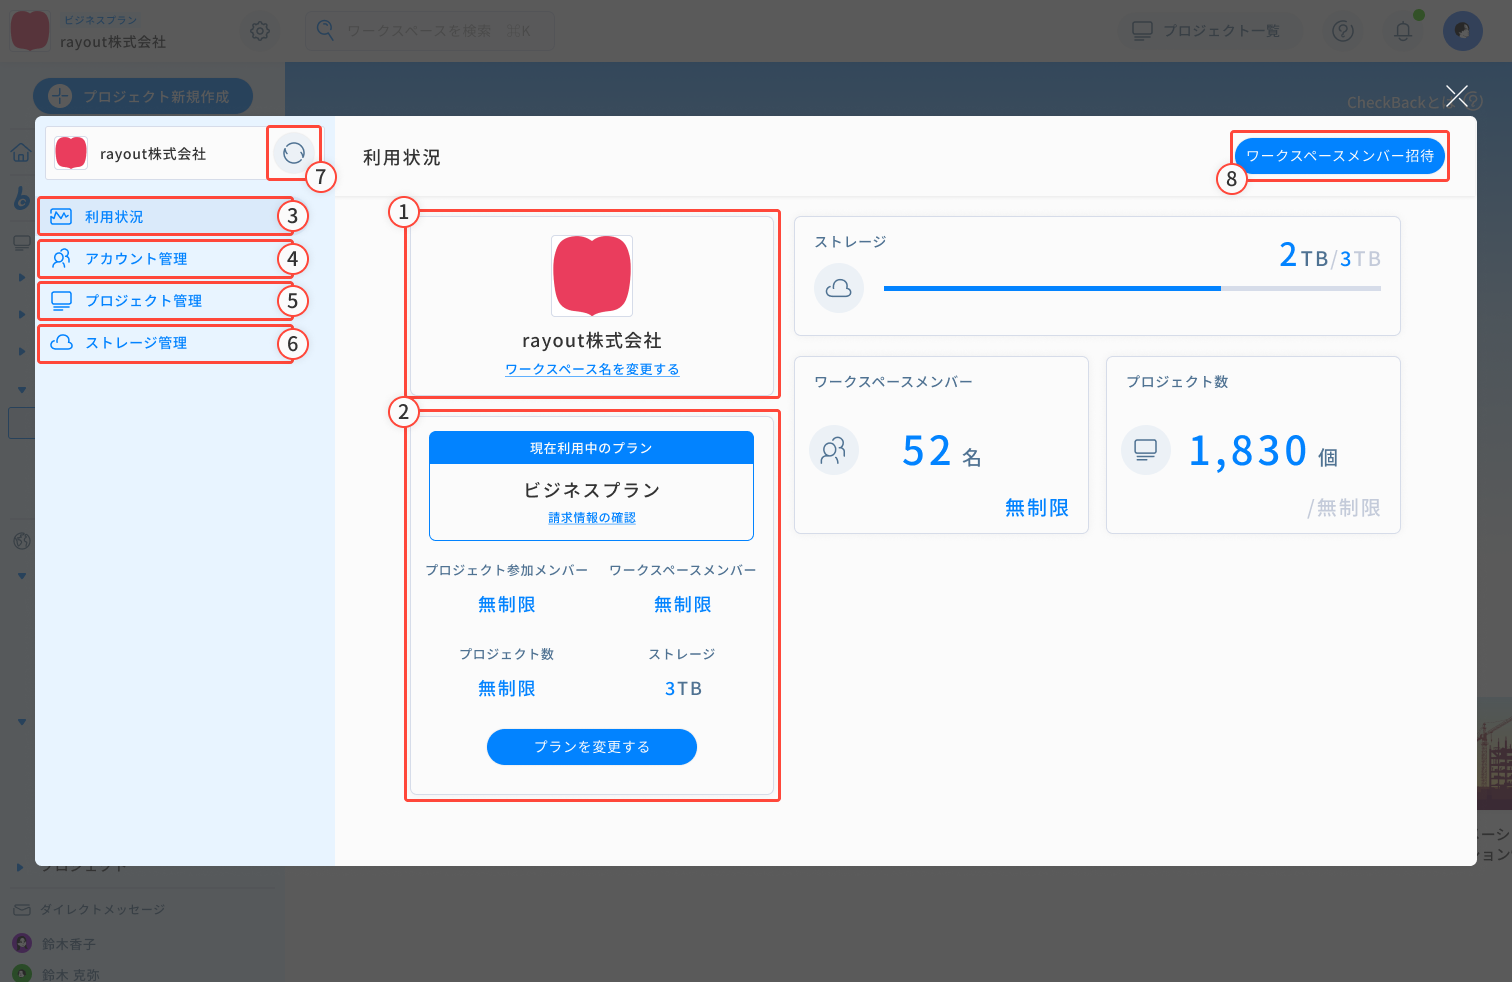
① Workspace Name & Icon
Displays the current workspace name. Click “Edit Workspace Name” to change it.
② Plan Information
Shows the current subscription plan and its usage limits. Click “Change Plan” to switch to a different plan.
③ Usage Status
Displays current usage for storage, workspace members, and project count.
If the usage exceeds the limit, it will be shown in red. Upgrade the plan or manage items as needed.
Only the workspace owner can change the plan.
④ Member Management
Invite, delete, and manage permissions for members. See “O. Member Management” for details.
⑤ Project Management
Delete projects and manage participants. See “O. Project Management” for details.
⑥ Storage Management
Check usage and bulk delete data. See “O. Storage Management” for details.
⑦ Switch Workspace
Switch between your workspaces using the Switch button.
All joined workspaces are displayed; select one to switch.
2. Check, Change, or Cancel Plans
You can view the details of your current subscription plan and manage changes or cancellations here.
Only the workspace owner can change or cancel plans.
Upgrading Before the Current Billing Date
The unused portion of the current plan will be prorated and deducted, and the new plan will take effect immediately.
Downgrading Before the Current Billing Date
The new plan will take effect on the next renewal date. Until then, the current plan remains active.
Plan Change / Cancellation Flow
- Click “Change Plan” to view available plans.
- Select the desired plan, review the billing details, and click “Upgrade” or “Downgrade.”
- For cancellations, click “Cancel Subscription” in the plan table and complete the process on the Stripe screen.
3. Member Management
Workspace Members vs. Project Members
CheckBack has two types of members: workspace members and project members.
They differ in their roles and access scope.
Workspace Members
Belong to the same workspace and can freely join any project in that workspace.
They can see all projects and track overall progress.
Workspace membership is required to oversee and manage team-wide activities.
Project Members
Only participate in specific projects.
Often used for inviting external partners involved in production tasks.
They can access and comment only within that project and cannot see other projects or workspace-level data.
Use workspace members for those managing across projects, and project members for those only involved in a specific case.
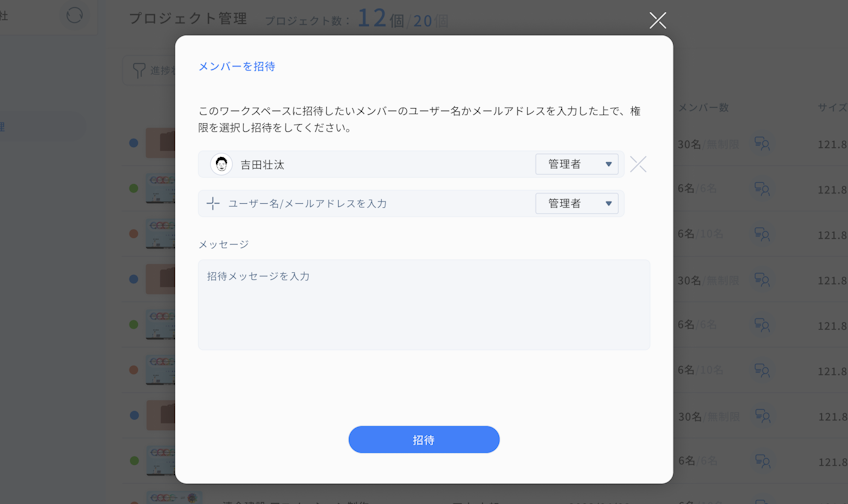
Inviting Workspace Members and Billing
- Click “Invite Workspace Members” to open the invite screen.
- Enter the username or email, select permissions, and send the invitation.
Each additional workspace member incurs a per-user account fee.
【Permissions】
Admin:Full access to workspace settings
Member:Cannot change member permissions or delete members
- To delete a member, click the “×” next to their name.
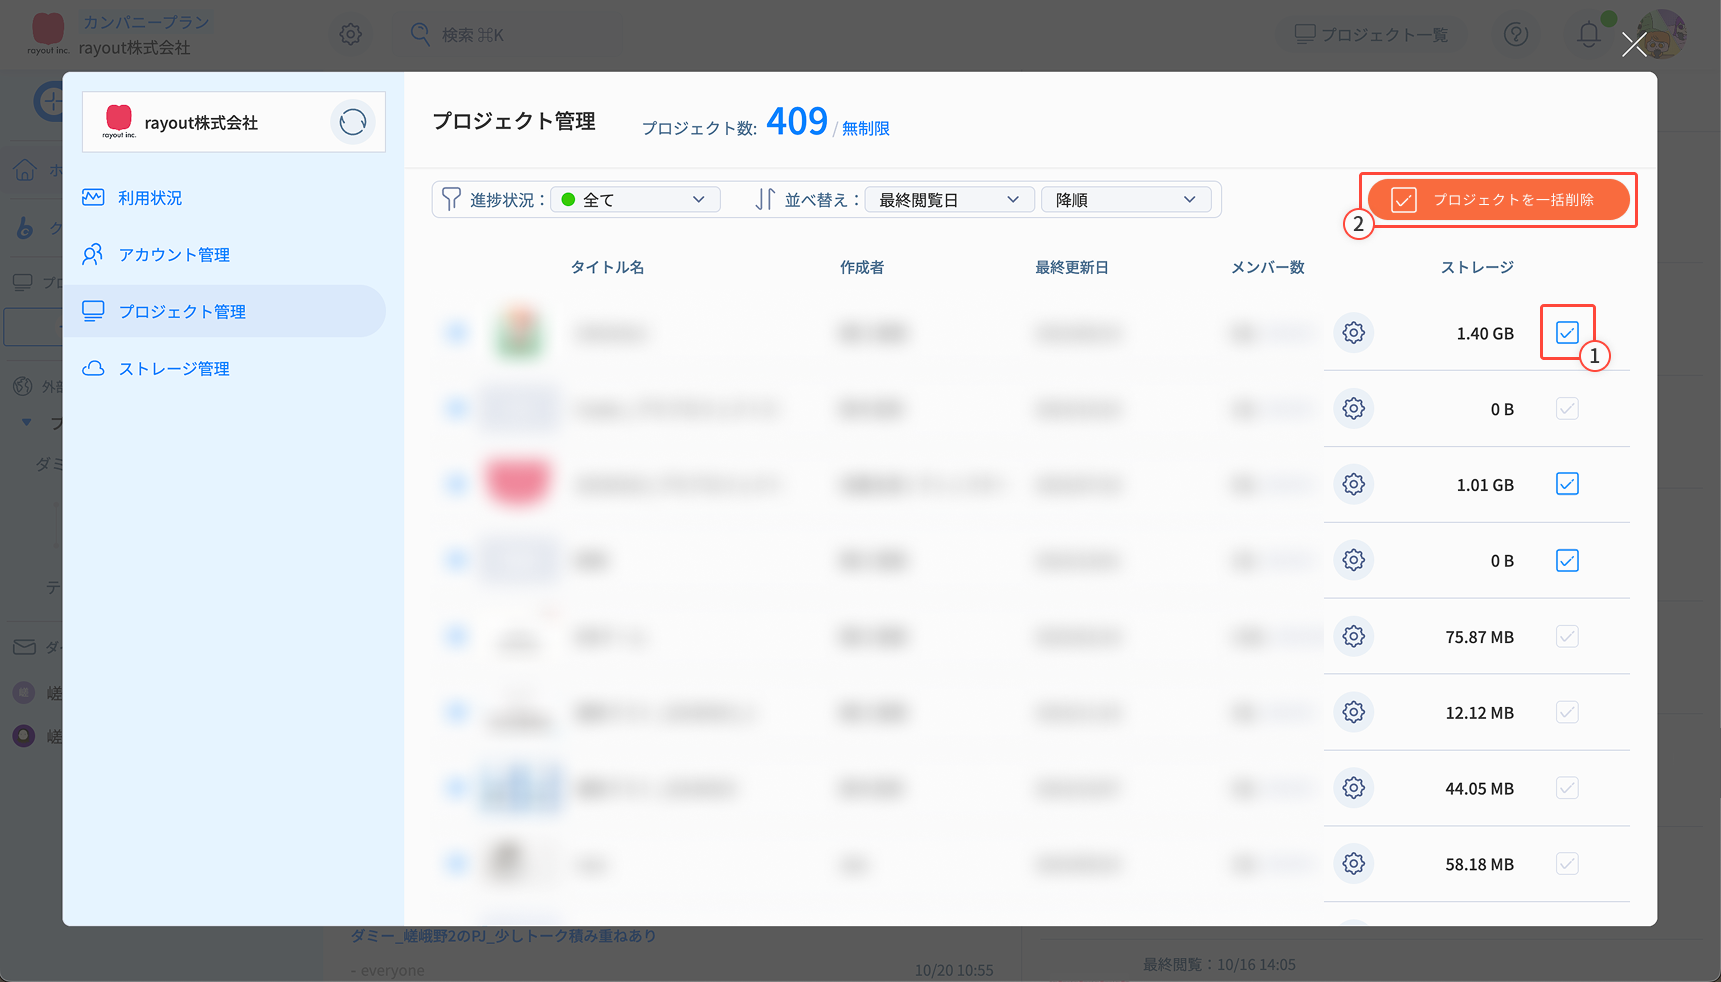
4. Project Management
Manage all projects in the workspace. Useful for bulk deletion.
Only the workspace owner can delete projects.
Project Deletion
- Select the checkbox of the project to delete.
- Click “Bulk Delete Projects” in the top right and confirm.
Deleted projects are permanently removed and cannot be restored.
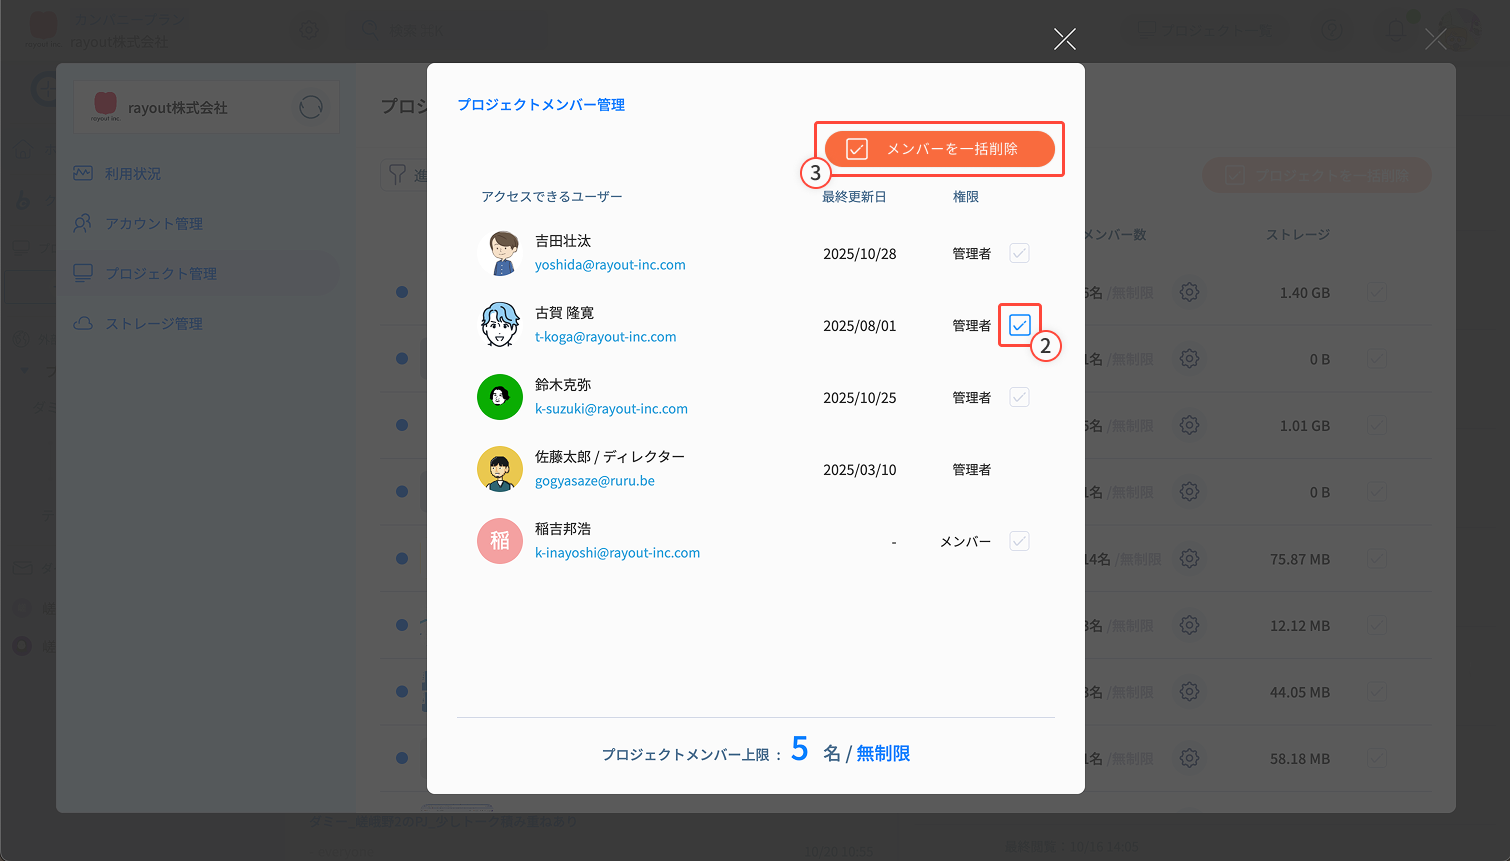
Check or Remove Project Members
- From the project gear icon, view its members.
- To remove members, select their checkboxes.
- Click “Bulk Remove Members” and confirm.
Removed members lose access unless invited again.
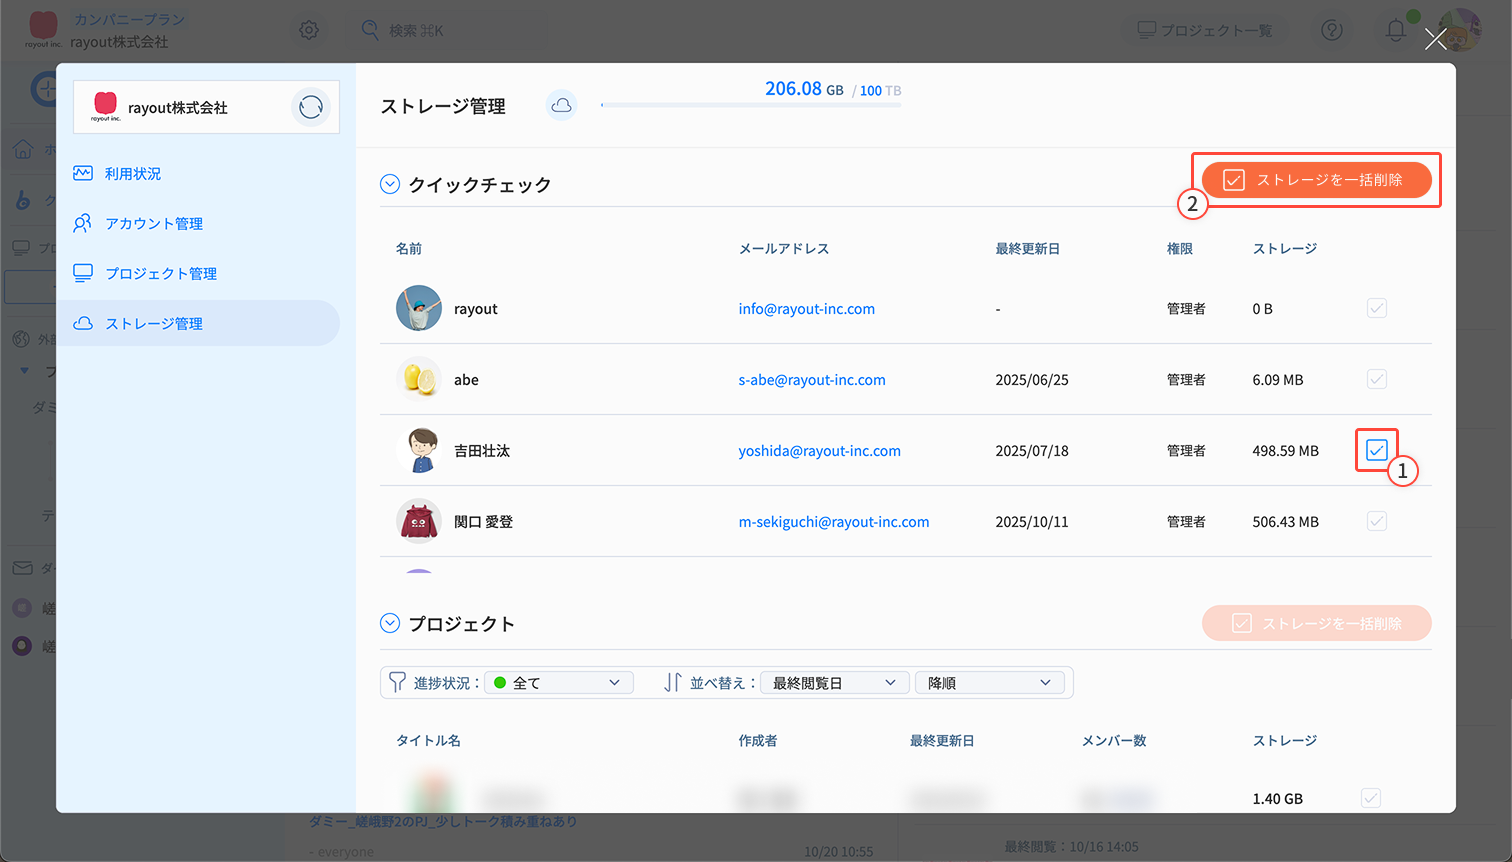
5. Storage Management
You can delete Quick Check storage and project storage used by all workspace members.
Ideal for centralized storage management. Only the workspace owner can perform this action.
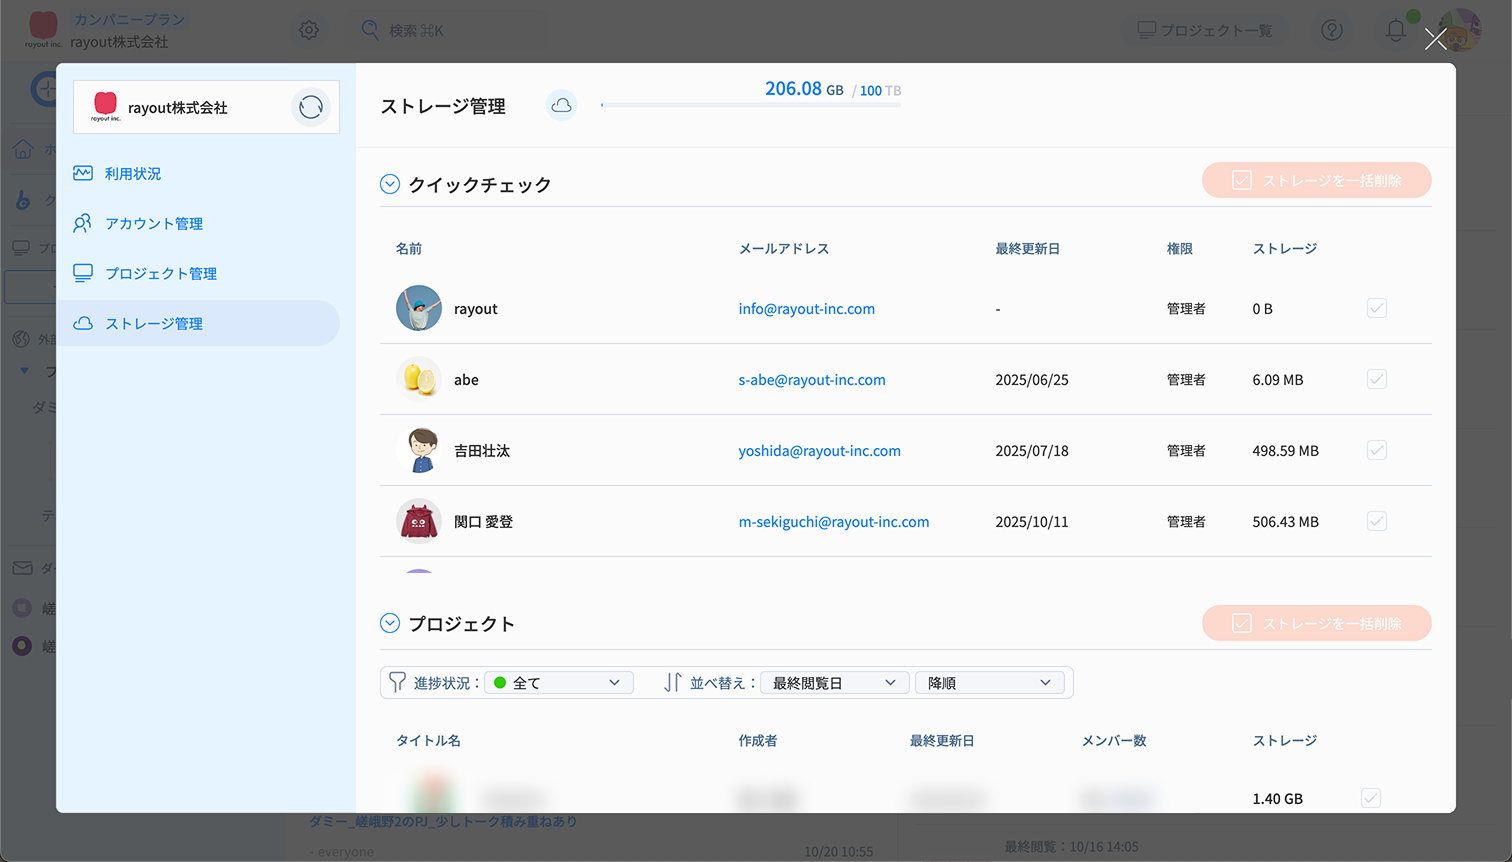
Deleting by Quick Check / Project
- Select the checkbox for the Quick Check or project storage to delete.
- Click “Bulk Delete Storage” and confirm.
Deleted storage is permanently removed and cannot be restored.
- You cannot delete Quick Check and project storage at the same time.
Please delete them separately in two steps.